
A simple scarf can be your go-to accessory for adding color, texture, and personality to any outfit. Yet many of us default to the same old drape or loop—never realizing the sartorial magic hiding in a few clever knots and twists. Learning how to tie a scarf opens up endless styling possibilities: from accentuating your neckline and framing your face to adding flair to a favorite handbag or even transforming a plain ponytail into a chic hair accessory.
Whether you’re battling a chilly office, heading into a springtime brunch, or seeking a weekend style upgrade, this in-depth guide will take you through ten inspired techniques. Each method is crafted for beginners and fashion-savvy pros alike, with clear, keyword-rich subheadings, numbered steps, and actionable tips to ensure your confidence shines through every loop and knot. Ready to revolutionize your accessory game? Let’s dive in.
1. The Classic Loop (Neck)
The go-to style for both warmth and polish, the Classic Loop is perfect for day or night.

- Fold & Drape: Fold your scarf lengthwise in half. Drape around your neck so the loop sits on one side.
- Pull Through: Take the loose ends and feed them through the loop.
- Adjust: Gently tug the loop to tighten or loosen, ensuring the ends hang evenly.
Pro Tips:
- Use a lightweight silk or chiffon scarf for a delicate loop in spring or summer.
- Opt for a chunky knit in winter and tuck the ends under your coat for extra warmth.
2. The Parisian Knot (Neck)
A sleek, Scandinavian-inspired twist that elevates any coat or blazer.
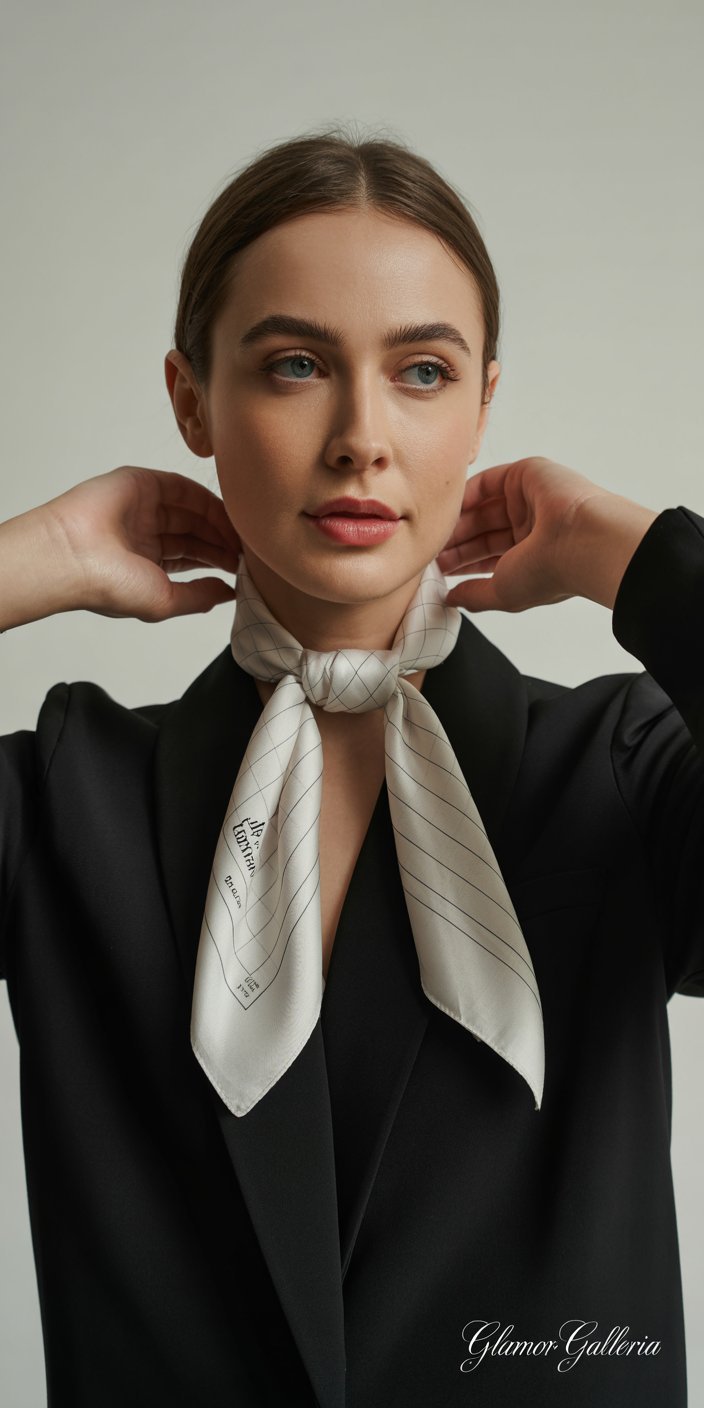
- Fold & Place: Fold scarf in half lengthwise. Place around your neck with the looped end to your left.
- Cross & Tuck: Cross one loose end over the other, then pass it behind and through the loop.
- Secure: Adjust the knot close to your throat, creating a neat “cow hitch.”
Why It Works:
- Hides scarf ends for a minimalistic finish.
- Ideal for both men’s and women’s scarves, bridging unisex style effortlessly.
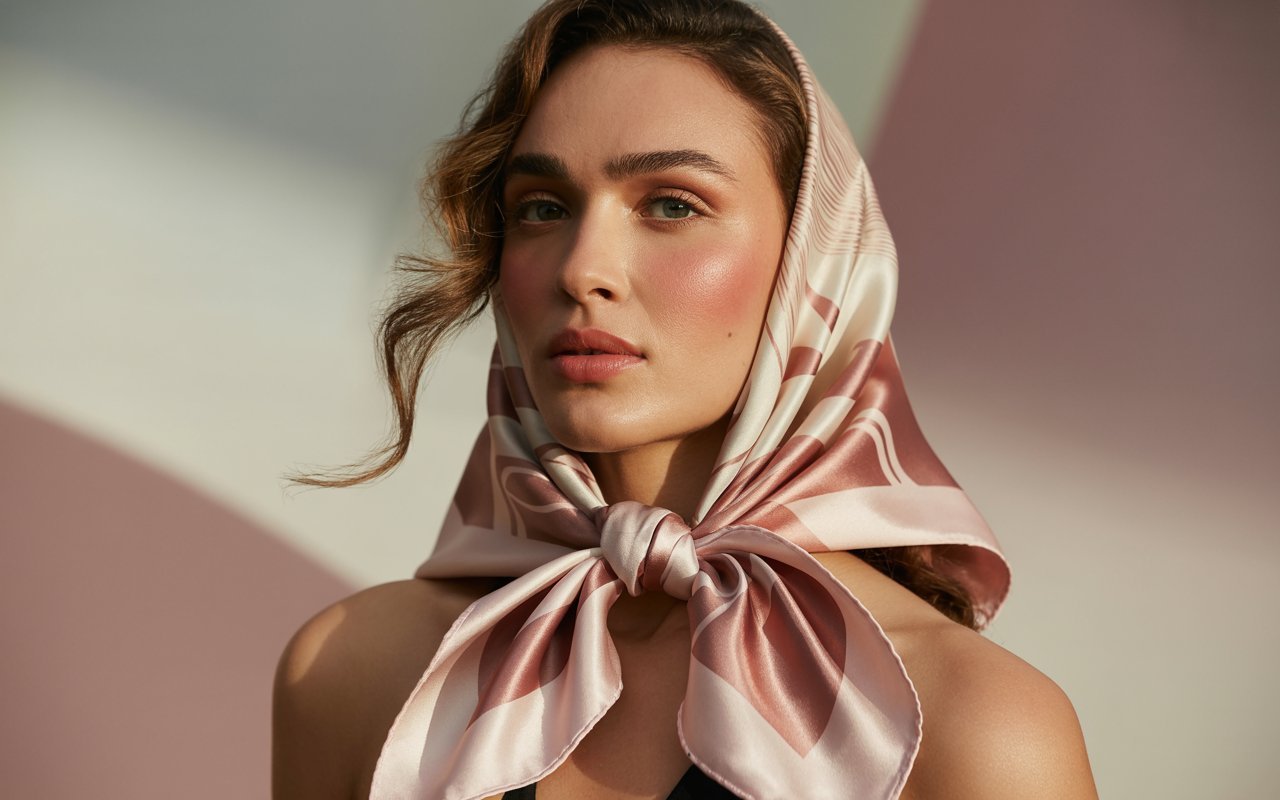
3. The Ascot Wrap (Neck)
Channel British sophistication with this refined drape.
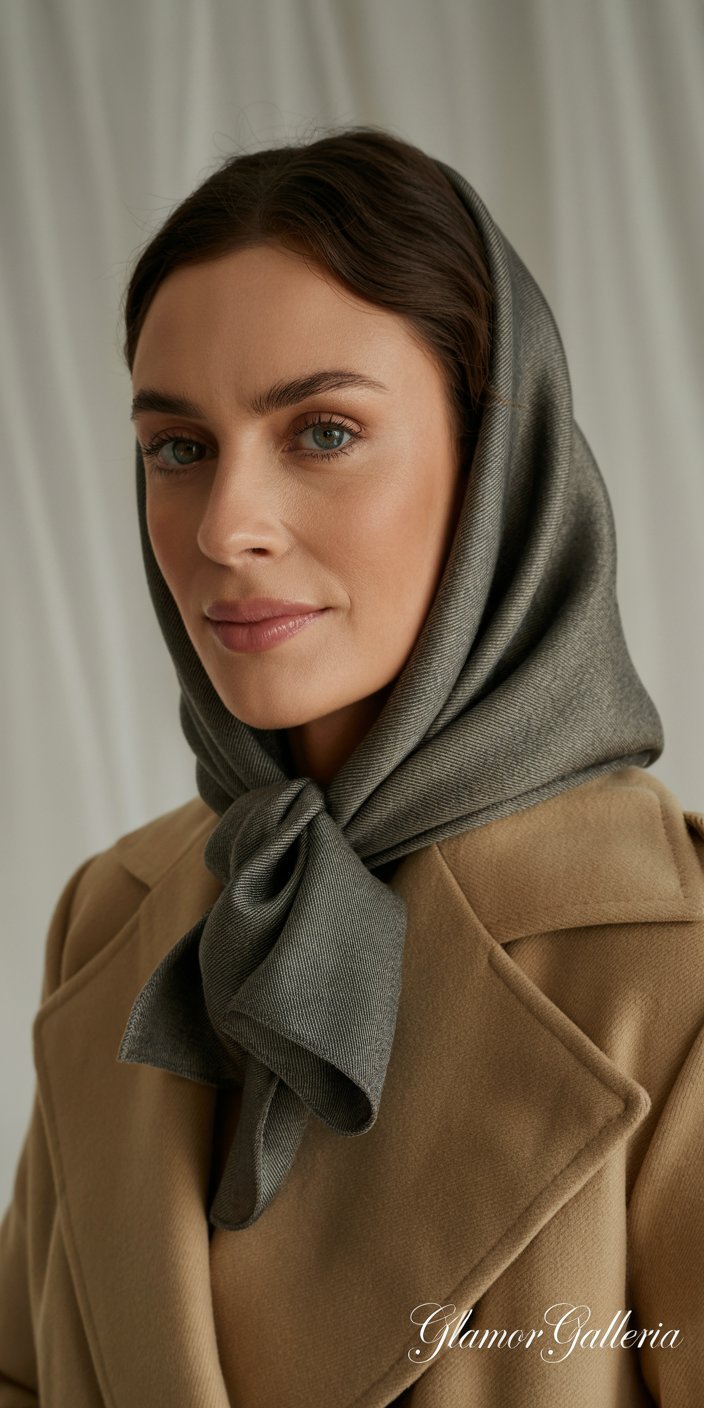
- Drape Evenly: Place the scarf around your neck so both ends are even.
- Cross & Knot: Cross one end over the other and pull it up through the neck opening.
- Tuck & Fluff: Tuck both ends loosely into the loop you’ve created, then fluff the fabric for volume.
Styling Notes:
- Best with mid-weight fabrics like wool blends or thick silk.
- Pair with a tailored blazer or trench for instant Savile Row appeal.
4. The Headband Twist (Hair)
Transform a scarf into a statement headband in seconds.

- Fold to a Band: Fold a long, rectangular scarf into a narrow band (about 1–2 inches wide).
- Position & Knot: Place the center at your hairline; bring ends behind and tie a tight knot at the nape.
- Tuck or Bow: Tuck the loose ends under the knot for a polished look, or leave them to form a bow.
Practical Tips:
- Silk scarves minimize friction and help protect delicate hair.
- Use bobby pins to secure the scarf at the temples for extra hold.
5. The Braided Ponytail Accent (Hair)
Add texture and color to a simple ponytail.
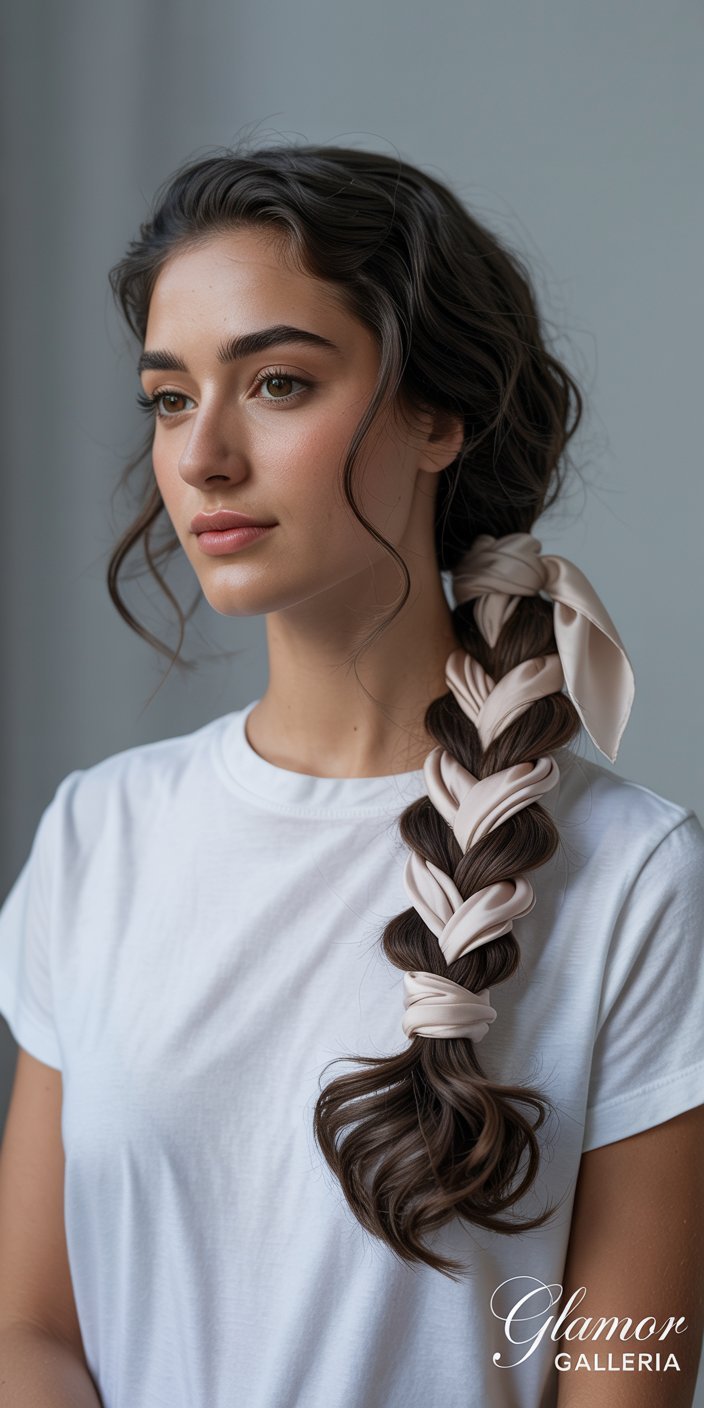
- Fold & Braid: Fold scarf lengthwise; braid it into your hair by integrating it with three hair sections.
- Secure Ends: Once you reach the end, tie with the scarf’s own ends.
- Fluff for Volume: Gently tug each braid segment to add fullness.
Why You’ll Love It:
- Perfect for festivals, vacations, or a fun weekend upgrade.
- Works best with medium-weight scarves for a defined braid.
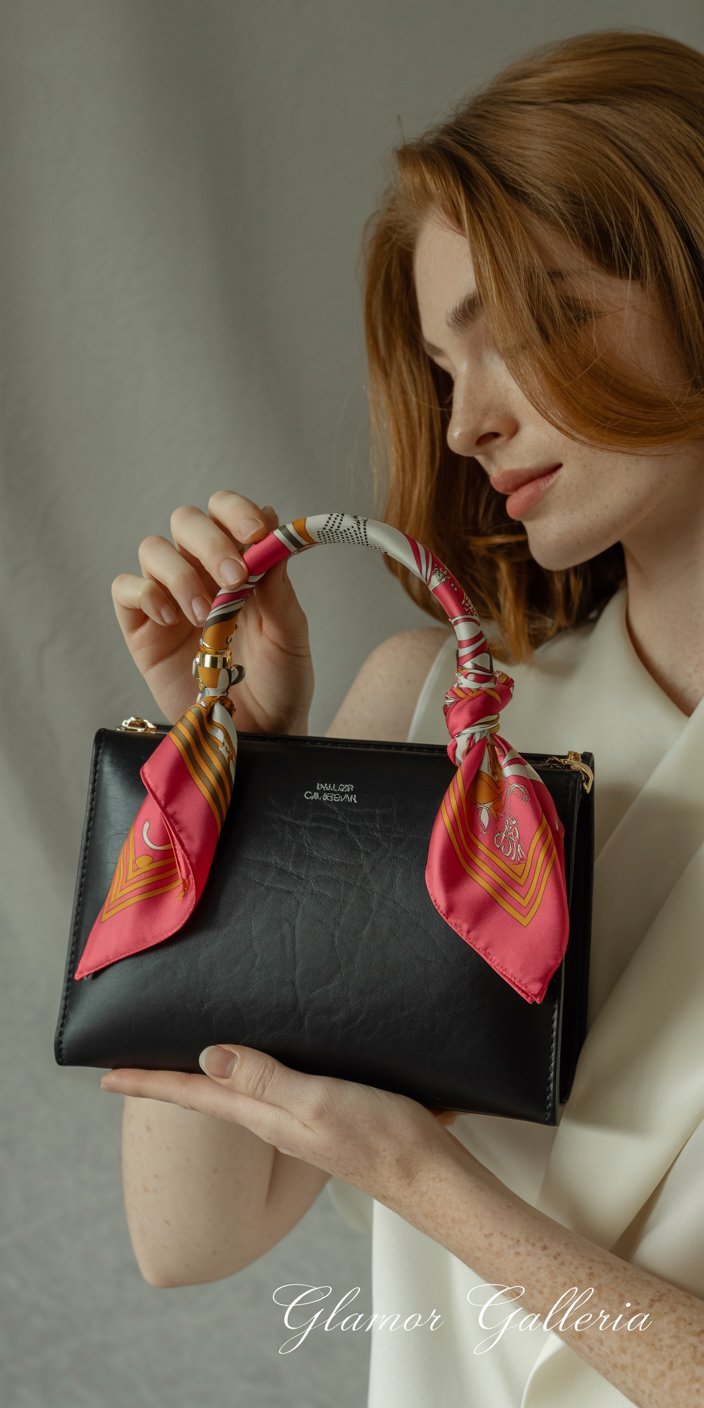
6. The Bag Handle Wrap (Bag)
Give your favorite tote or satchel a custom twist.
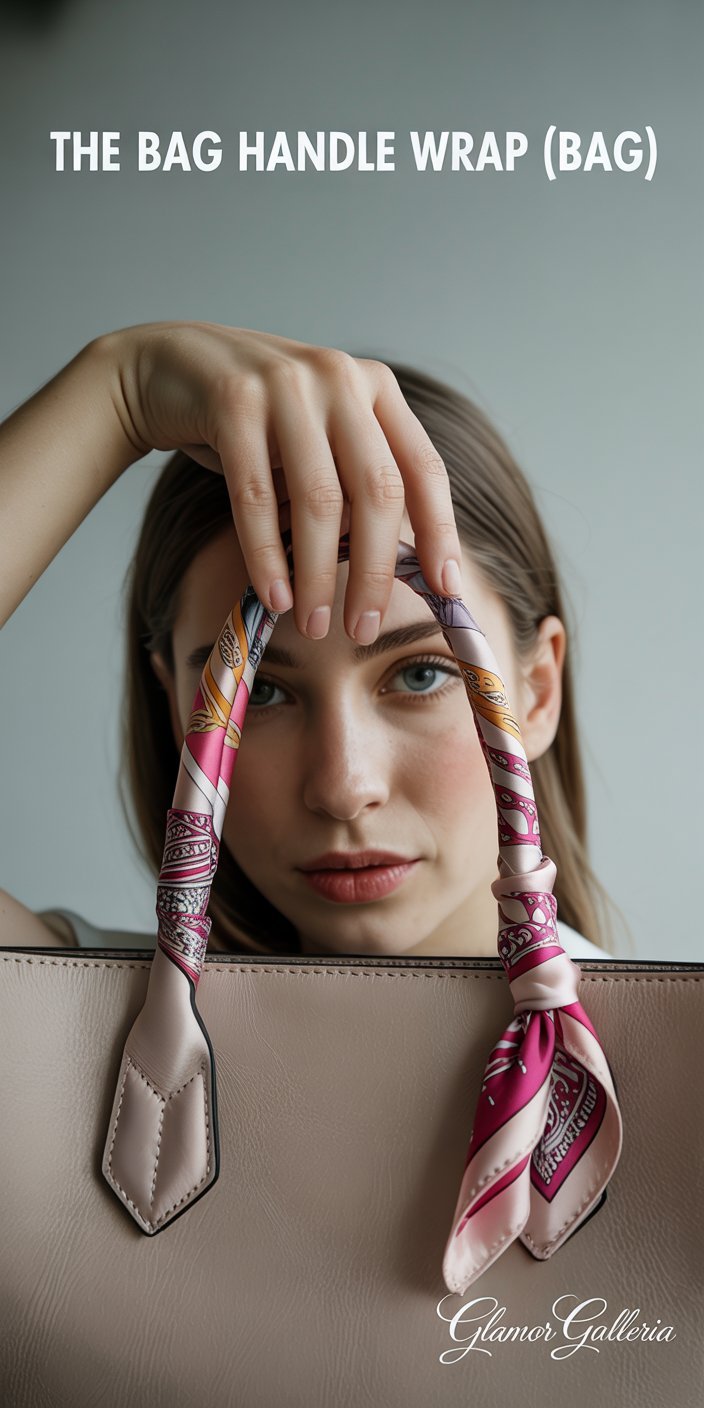
- Untwist & Align: Lay the scarf flat. Place one end at the base of one handle.
- Wrap Tightly: Wind the scarf around the handle toward the top, overlapping each coil.
- Tie & Hide: Tie the ends in a small knot inside the bag, then tuck under the wrap.
Insider Tip:
- Choose a bright print to brighten a neutral leather bag.
- Swap out periodically for a fresh look without buying new hardware.
7. The Bow Handle Charm (Bag)
A chic alternative to keychains or charms.
- Fold into a Square: Fold scarf into a square, then into a narrow band.
- Loop & Tie: Loop once around the bag handle and tie a loose bow at the front.
- Adjust: Fluff the loops and tails for a voluminous bow.
Style Hack:
- Mix prints: Pair a striped bag with a floral scarf for a high-contrast statement.
- Smaller scarves (20”×20”) work beautifully for petite crossbody handles.
8. The Belted Drape (Waist)
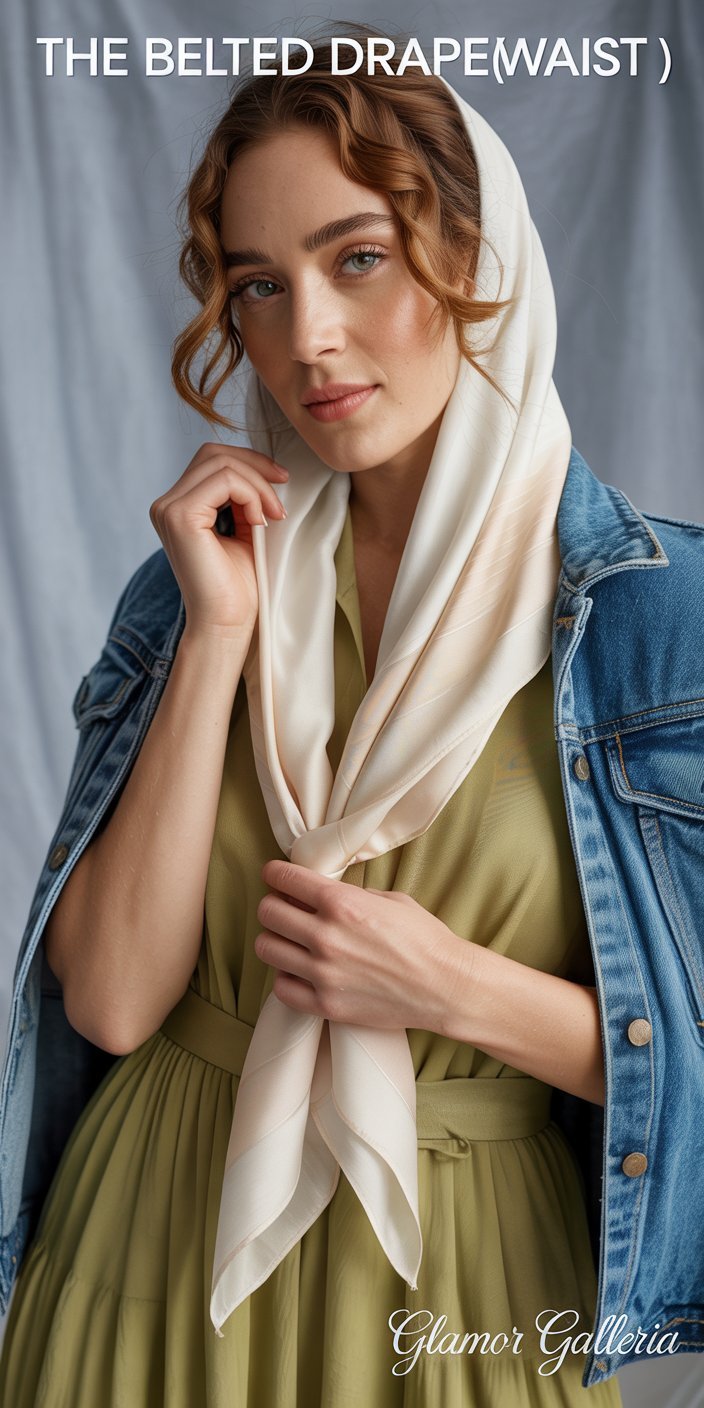
Use a scarf as a lightweight belt for dresses or tunics.
- Fold in Half: Fold scarf lengthwise to desired width (2–3 inches).
- Wrap & Knot: Wrap around your waist and tie a single or double knot off-center.
- Layer: Top with a blazer or denim jacket for structured contrast.
Why Try It:
- Defines the waist on flowy silhouettes.
- Ideal for adding pattern without overwhelming the outfit.
9. The Shawl-Style Wrap (Shoulders)
Turn an oversized scarf into a cozy shawl for cool evenings.
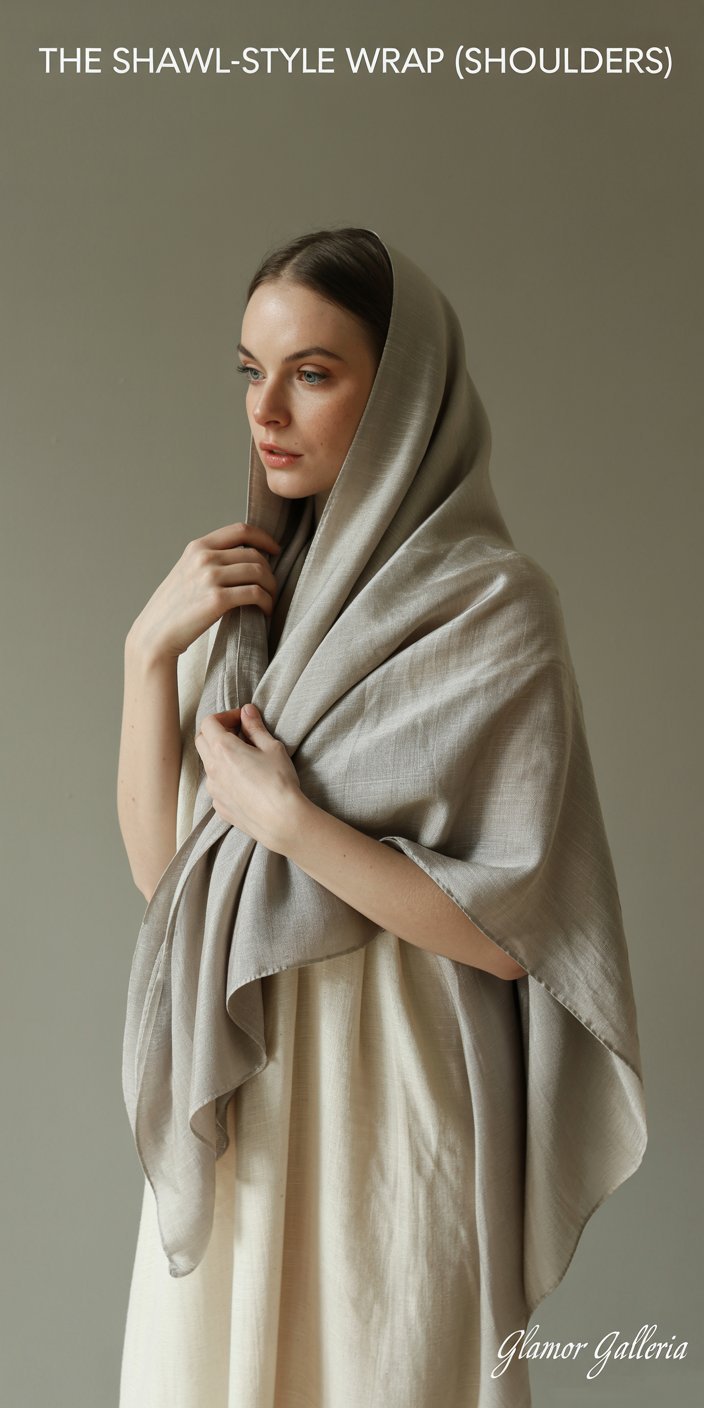
- Drape Like a Cape: Lay the scarf evenly across your shoulders, letting the ends hang in front.
- Secure with Belt (Optional): Cinch at the waist for a poncho effect.
- Let It Flow: Wear loose for maximum drama or tuck one end for asymmetry.
Practical Tip:
- Linen scarves work well in transitional seasons; cashmere blends keep you warm in winter.
10. The Wrist Wrap Bracelet (Wrist)
A playful alternative to a bracelet or watch strap.
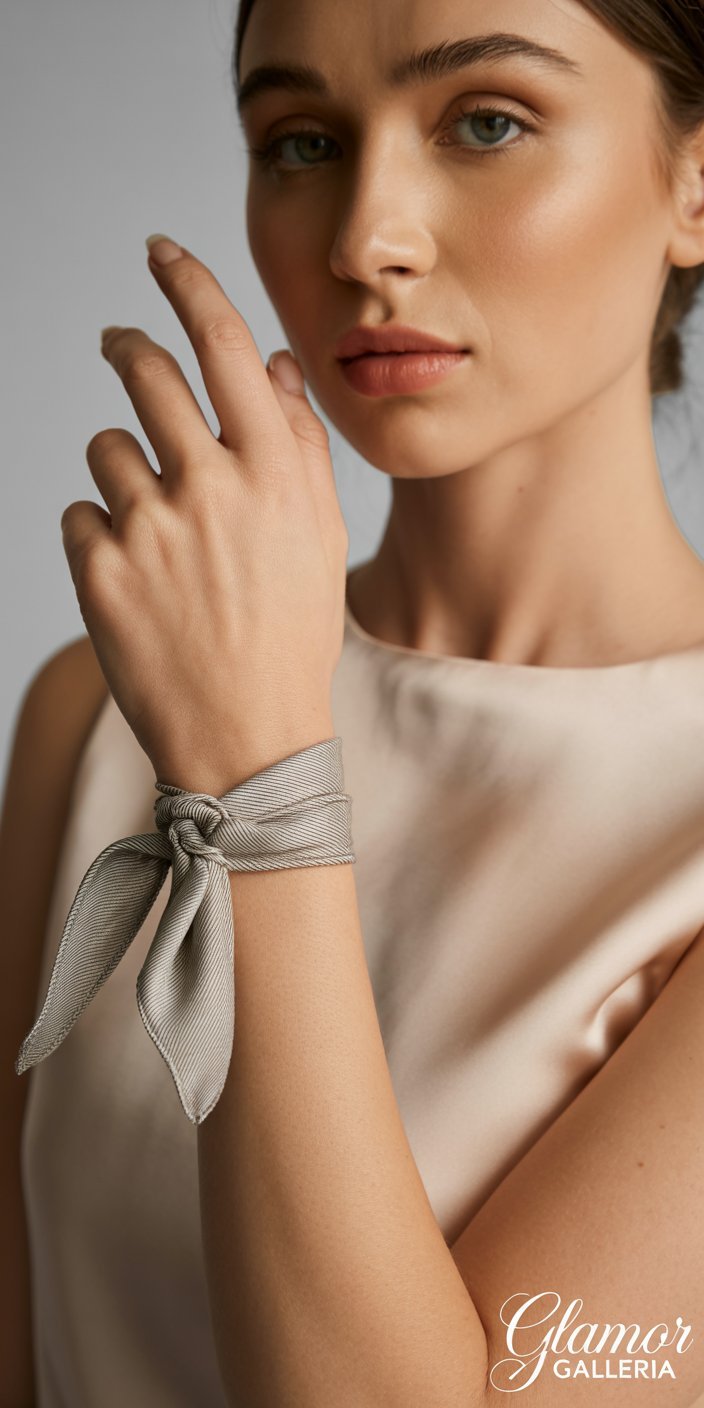
- Fold & Wrap: Fold scarf into a long band. Wrap twice around your wrist.
- Tie a Knot: Secure with a small knot on the top or side.
- Style: Allow tails to trail for a boho vibe or tuck under for a sleeker finish.
Why It’s Brilliant:
- Instantly adds color and pattern to minimal outfits.
- Swap daily to match your mood or outfit palette.
Details: Step-by-Step Tips & Fabric Guide
- Silk & Satin: Best for headbands and delicate knots—minimal bulk, maximum sheen.
- Wool & Cashmere: Ideal for neck wraps in fall and winter—cozy, warm, and insulating.
- Cotton & Linen: Perfect lightweight options for spring/summer drapes and bag accents.
- Width & Length Matters: Standard scarves (60″×10″) work for most neck and hair styles; oversized (80″×30″) double as shawls; small squares (18″×18″) shine as bag or wrist wraps.
- Color Theory: When mixing with outfits, lean on complementary colors (opposites on the color wheel) for bold contrast, or analogous hues (neighbors on the wheel) for a harmonious look.
FAQ
Q1: What is the easiest way for beginners to learn how to tie a scarf?
Start with the Classic Loop (Section 1). It requires just one fold and one pull-through and works with almost any scarf shape. Perfect for learning basic tension and drape before exploring more intricate knots.
Q2: Which scarf material is best for hair styling techniques?
Lightweight fabrics like silk and satin glide through hair without snagging or frizzing, making them ideal for the Headband Twist and Braided Ponytail Accent (Sections 4 & 5). They also help maintain hair health by reducing friction.
Q3: Can I use one scarf for multiple styling methods in a single day?
Absolutely! Keep a standard-size scarf in your bag and experiment mid-day: wrap it as a Shawl-Style Wrap for an outdoor lunch, then knot it as a Bag Handle Wrap for evening errands. Versatility is the hallmark of scarf styling.
Conclusion
From the boardroom to brunch, weekend markets to evening events, mastering these 10 creative ways to tie a scarf ensures you’ll always have a fresh, personalized accessory at the ready. By practicing these techniques—centered around the keyword how to tie a scarf—you’ll build confidence and express your unique style with every knot and twist. Which method will you try first? Share your favorite in the comments below, subscribe for more style tutorials, and don’t forget to tag us on Instagram with #TieItYourWay!